
1.Sign in to Blogger dashboard.
2. Now, Select a blog on which you would like to enable HTTPS
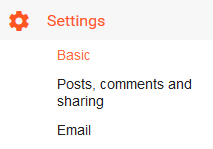
3. Go to Settings > Basic > HTTPS Settings
4. In HTTPS Availability, select YES.
It might take some time to enable HTTPS (SSL) on your blog. So wait for few minutes and let another HTTPS redirect option be ready for enabling.
5. HTTPS redirect will help you in getting your HTTP traffic redirect to your new secured HTTPS server, so don’t forget to wait sometime and enable it.
This option ensures all of the visitors will see your blog on HTTPS connection.
Congrats! you have successfully enabled Blogger HTTPS on a blog with a custom domain. Share your experience while implementing SSL for Blogger custom domain. Do not forget to share your old and new posts with new HTTPS URLs.