
Table of Contents
- Download Files from cPanel
- Download Database Backup or Export Database from cPanel
- Create a website in CyberPanel
- Upload Files on CyberPanel
- Create a Database in CyberPanel
- Import DataBase to CyberPanel
1. Download Files from cPanel
- Login to cPanel
- After logging in, go to the cPanel File Manager option in the cPanel dashboard.
- Open the file manager, then select the public_html folder and open it.
- Select and compress all the files for your website.
- A compressed file is present in the public_html once compression is completed. Select this file, and download it on your local computer.
If your internet speed is slow, You can skip the download on your local computer. Alternatively you can transfer the compressed file directly to your Cyberpanel File manager using ssh terminal command. if you need any support regarding this, please contact with us.
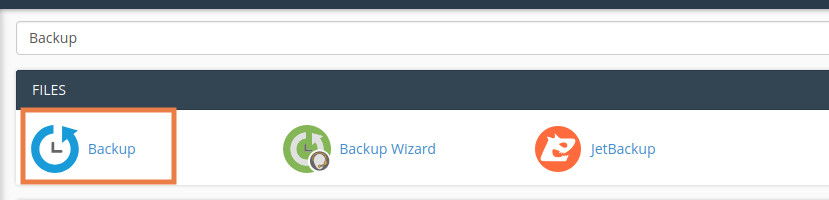
2. Download Database Backup or Export Database from cPanel
- Login to your cPanel.
- Click on Backup icon.
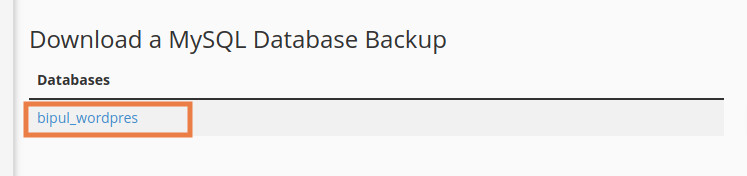
Under Download a MySQL Database Backup section, click on your database name to download the backup.
Or, Alternatively you can export the database file from PHPMyadmin:
- Check PHPMyadmin Option in the cPanel Dashboard and open it.

Once you click on the PHPMyAdmin option. A dashboard will open from where you can select and export your database.
- Once you are in the PHPMyAdmin Dashboard, select the database related to your website and click on the Export option.
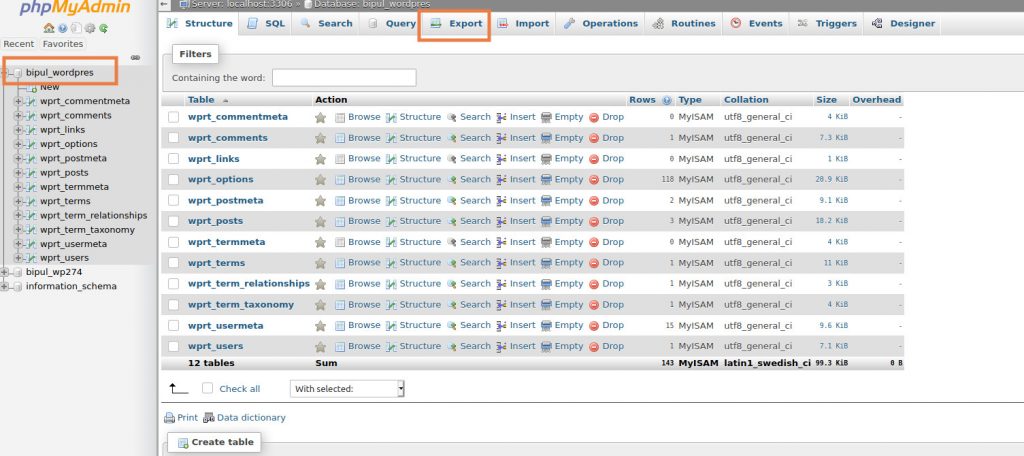
The exported database will save a compressed database file to your local computer.
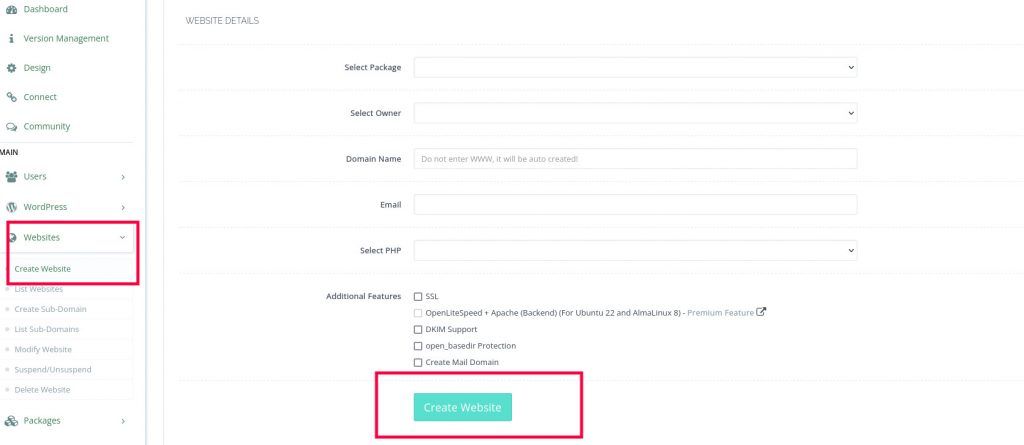
3. Create a website in CyberPanel
- Login to CyberPanel:
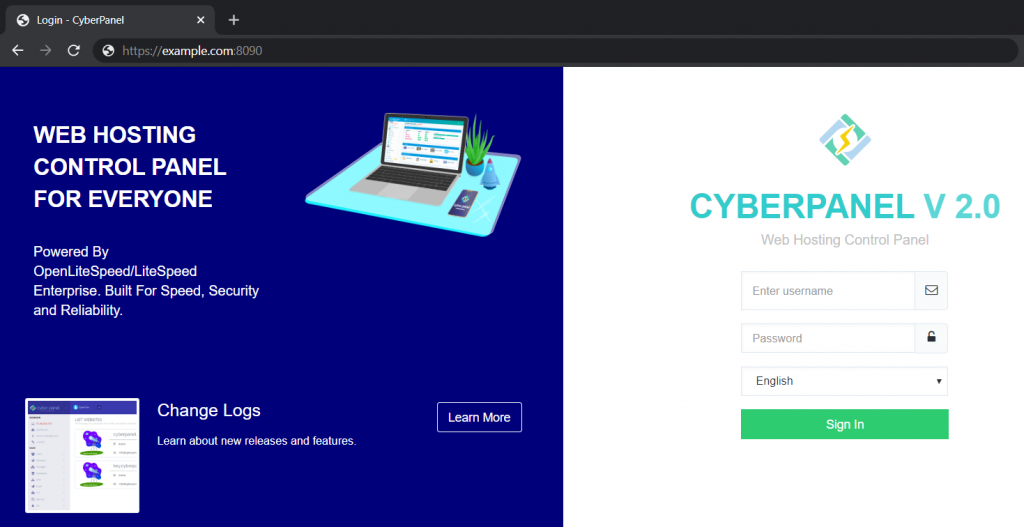
Like cPanel, you must first access your CyberPanel using your credentials to log in. To do this, look at the URL of your CyberPanel. It displays a screen for logging in. Provide the required username and password and access the dashboard.

- Create a Website:
After logging in, click on the Website -> Create option on the left menu or on the dashboard of CyberPanel. Then provide the information to create the site. Provide the exact URL of the site when you are creating the site.

4. Upload content on CyberPanel
Once you have completed the website creation process. Now it’s time to upload the content that is downloaded from the cPanel.
Go to the Website -> List Websites. Here you can see a website that you have already created. On the right side of this website, you can see a manage button. Click on it to open the Website Management Dashboard.

- Upload and Extract Content:
Once you get the website Management Dashboard.
Check the file manager option on the website manager dashboard.

- Open the file manager and here you will find the public HTML folder. Open this folder.

- Upload that compressed file download from cPanel to your computer.

- Once the file is uploaded, extract the file to retrieve content from it.

6. Create a Database in CyberPanel:
After uploading content. It is important to create a database that solves content issues.
- Create Your data base:

Click The Database button on Dashboard or in the left Menu:
- In next Step Click On create database option:
- Select the domain you added in last Step.
- Provide the required information and click on Create Database button.
Please note : You may need to update your wp-config. php file from Cyberpanel file manager with newly created database information.
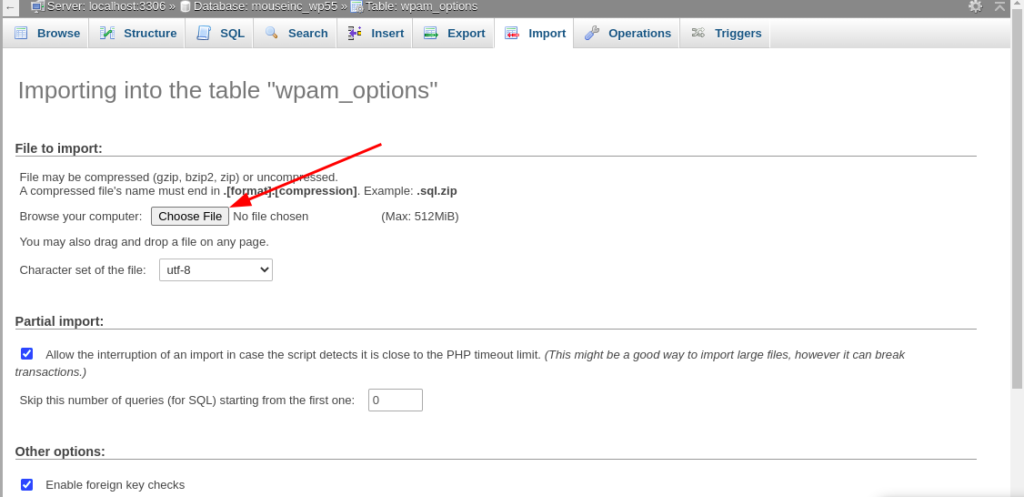
7. Import DataBase to CyberPanel:
- Login to PHPMyadmin:
Get access to PHPmyadmin goto Databases -> phpMyadmin in CyberPanel Dashboard.
Provide the credentials that are required to access.

- Now Import DataBase to CyberPanel:
After creating the database. Go to Import Option, then select the file that is exported database file from cPanel. Click the Go button at the bottom right of the page.
Thats it.